Tuesday, November 29, 2016

All Saints Day Costumes 2016

Way back at the start of this month we celebrated All Saints Day! Our local parish hosted a fun All Saints Day party for the kids, giving us the opportunity to put together some fun saint costumes. I'd been thinking about doing this for several years and was so excited for the opportunity!


Sam dressed as his all time favorite saint, St. Juan Diego. We simply got a large shirt at the thrift store and cut off the sleeves. Then we hot glued a picture of Our Lady Of Guadalupe, (he colored it himself!), and some artificial roses to the front. Drawing on a little mustache and goatee was the perfect finishing touch.What a dashing young man!


We dressed Rosemary in the traditional Swedish St. Lucia costume, also known as St. Lucy . In Sweden and other Scandinavian countries girls dress in this outfit on St. Lucia Day, (often with real candles!), and bring coffee and sweet breads to their family early in the morning. If you loved American Girl books back in the 90s you'll know what I'm talking about! My best friend had the Kirsten doll; I had Addy myself.  The candles on her crown reference the legend that St. Lucia would wear candles on her head so she could carry more when taking food to Christians hiding in the catacombs. The evergreen wreath represents eternal life, the white dress represents her purity, and the red sash represents her martyrdom. We found the perfect little white dress at the thrift store. It even already had loops for a sash. We just replaced the pink one it came with with a red ribbon. The holly headband has been in the family for a long time. Thanks Dad for letting us raid your Christmas boxes early! My husband fashioned some candles from card stock and taped them on. We layered with a long sleeved white t-shirt to accommodate the weather. While she's barefoot here, when we went to the party she wore white tights black dress shoes. I just couldn't get over how beautiful she looked!


Remember, God call each and every one of us to be saints!


Friday, October 28, 2016

The Birthday Takes the Cake - A Farm Birthday Party

Happy Birthday Rosemary! You are now a curious two year old who loves to talk, sing, and dance!

Two of my daughters favorite songs to sing are "Old McDonald" and  "The Farmer in the Dell." In fact sometimes she'll get upset with me if I play anything on the piano besides plunking out "The Farmer in the Dell." I guess she's not a fan of Beethoven or Grieg!

Due to her affinity for all things farm, I went with a farm theme for birthday celebration. I stole some cute ideas from the internet, but I came up with a few of my own too. It was fun to see Rosemary realize that the party was all for her!

All food was pretty easy to put together, and with some clever labeling and a little decoration we had a great time down on the farm!

 
 A simple red table cloth and some bandanas make for a great table scape! Throw in some paisley napkins and tractor plates and you are good to go! A drink dispenser that looks like a mason jar adds a nice touch. I got mine at Aldi for $20! 


The cake turned out so cute, and it was so easy to make! Anyone can do it. I made a 9x13 chocolate zucchini cake and cut off two corners. I frosted the cake in white and drew some lines down the cake with a toothpick. Then, to get the bright red color, I used a food coloring spray I found in the cake decorating section of the craft store. Add some pretzels, graham crackers, and yellow coconut for doors, a roof and hay along with a little green frosting grass at the bottom, and voila! My husband and the kids decorated the farm animal cupcakes which were a zucchini spice cake. I had a lot of zucchini from my garden this year. 


 For some easy decorations we bought plain balloons from Dollar Tree and used Sharpies to decorate them like farm animals! 


 We did snacks instead of a full lunch or dinner. With some clever labeling, simple snacks become farm themed! For example, this Chex mix became "Chicken Feed!" I got the chalk boards at Michael's for 99 cents each.

 Cucumber sandwiches cut with a duck shaped cookie cutter became Ducks in a Row! I layered thinly sliced cucumbers and whipped cream cheese mixed with fresh dill onto white bread. 


 A simple fruit tray become the fruit orchard. 

 And of course a veggie tray becomes the vegetable garden!


 We made our own "Pigs in a Blanket" with crescent roll dough and cocktail franks. You could save time by buying frozen too. 

I'm pretty proud of this one because I came up with it all by myself. We all know that last verse of "The Farmer in the Dell" is "the cheese stands alone." So I put together a cheese and cracker tray and put it on a separate table from everything else!


Happy Birthday Rosemary! Here's to the Terrific Twos!

Tuesday, October 4, 2016

Dance, Martha Graham, and the Theology of the Body

Happy World Ballet Day!  Enjoy this (very old) dance picture!

I've been dancing most of my life, and still take and teach classes.  While my favorite style to dance myself is tap, when I learned it was World Ballet Day today I remembered something I wrote before my blogging days connecting dance with theology, and thought I would revisit these thoughts and share them with you.

Our bodies are beautiful. They are an integral part of us and a gift from God. The way our bodies are made and how we use them show truths about God's nature and His plan for human beings. This is the core teaching of St. John Paul II's Theology of the Body. Though most often used to teach about the meaning of marriage, (very beautifully I might add. When I first heard about these teachings in relation to marriage I was blown away!), the teachings of the Theology of Body apply to everyone, regardless of age or marital status, after all, we all have bodies. Due to the fact that people often abuse the gift of the body, there is a school of thought that demonizes the body; treats it as something inherently bad that we will be freed from when we go to heaven.  This couldn't be farther from the truth. We are not souls trapped in bodies, we are embodied souls, and the Catholic Church teaches that after the final judgment our bodies will be joined with us in heaven.

How could a Catholic dancer not  be excited about these beautiful teachings about our bodies! Dance is one of the  ultimate expressions of the incredible miracle of our bodies and the truth that we are fearfully and wonderfully made. There are many benefits to dancing; including physical fitness and improved memory and cognition, but in the end there is no real purpose to dancing like there is to things like math and reading. No real purpose except a pure celebration of who we uniquely are as humans. The beauty of great works of art and music are often used as proofs of God's existence, and I believe the beauty of dance falls into that category.

Take a look at this video of ballerina Polina Semionova dancing to Herbert Groenemeyer's  "Demo (Letzter Tag)." This piece in particular always points my thoughts to God. Not only does Polina dance exquisitely to a beautiful song, but she dances in an empty auditorium with no audience, no sets or spotlights, no fancy costume. It is all about the simple joy of dance. You can see the beauty of even a simple step or reach of the hand. Often, when I need a reminder of God's existence in our world, I pull up this video.


I first started  making these connections between dance and God when I was looking up dance quotes to share with my students. When looking at what Martha Graham, a very influential American dancer/choreographer often referred to as "the Picasso of dance," had to say I found that many of the quotes resonated with the Church's teachings. Not only about the body, but about bearing crosses, and the meaning of true freedom. I do not know what  Graham's commitment to her faith was, so I don't know how much she connected her thoughts on dance and the human body to God, but even if the connection was not consciously there, it shows how the natural order of our world points to the Truth. Here are some of my favorite Martha Graham quotes.

"Dancing appears glamorous, easy, delightful. But the path to paradise of the achievement is not easier than any other. There is fatigue so great that the body cries, even in its sleep. There are times of complete frustration, there are daily small deaths." 

"The next time you look in the mirror, just look at the way the ears rest next to the head; look at the way  the hairline grows; think of all the little bones in your wrist. Think of the magic of that foot upon which your whole weight rests. It is a miracle. And the dance is a celebration of that miracle." 

"I did not want to be a tree, a flower, or a wave. In a dancer's body, we as audience must see ourselves, not the imitated behavior of everyday actions, not the phenomenon of nature, not exotic creatures from anther planet, but something of the miracle that is a human being."

"Freedom to a dancer means discipline. That is what technique is for - liberation." 

"You are unique, and if that is not fulfilled, then something has been lost."

"The body is a sacred garment."  - St. John Paul II would agree!

St. Vitus, patron saint of dancers, pray for us!

Friday, September 30, 2016

St. Andrew Kim - Crockpot Bulgogi

I'm cutting it close, but I've made my goal of getting this post in before the end of September! I think I always forget a little bit how crazy the beginning of the school year is, especially in a virtual school!

Thankfully when we celebrated the feast of St. Andrew Kim back on September 20th, our Korean recipe was great for a quick and easy weeknight meal. The sauce is so delicious it even gets my kids to eat their broccoli! For one of them it is a much bigger deal than the other, but a dinner victory nonetheless.

St. Andrew Kim was the first Korean to be ordained a priest and helped lead Korean Christians through a time of terrible persecution. My son noted that today where we live we don't have to worry about things like this. I told him that in Korea it is better now too - when my dad was in Korea several years ago he could go visit Catholic pilgrimage sites without fear. There are many challenges we face as Catholics in today's modern world, but it is good to remember to be thankful for the fact that we can practice our faith without fear of death, and to thank the martyrs who have sacrificed before us. Without St. Andrew Kim and his companions and the sacrifices they made, I'm sure those beautiful places my dad got to visit wouldn't exist. We must also remember that in other places in the world today there are Christians who still face persecution and risk death simply for practicing their faith - it's current events, not ancient history. Keep them in your prayers to help grant them strength and safety.


Using the Korean inspiration of St. Andrew Kim, we made one of husband's favorite things to eat and one my favorite words to say - bulgogi. Basically a Korean barbecued beef. I think that if you are a fan of teriyaki, you will likely also be a fan of bulgogi. It's a little more savory and spicy than teriyaki, but still similar with the meat being cooked in a sweet sauce with Asian flavors. Though not traditional for bulgogi, we made ours in the crockpot which is great for a weeknight. Throw it together in the morning and all you have to do to get dinner ready after work is make a pot of rice.

Crockpot Bulgogi

1 1/2 lbs thinly sliced beef (I found some already "thinly sliced for carne picata" as it stated on the package)
carrots and onions cut into small chunks
2 Tbsp sugar
4 Tbsp soy sauce
8 tsp minced garlic
4 tsp sesame oil
 pepper
sesame seeds for garnish

Combine the meat, vegetables and marinade ingredients in a crockpot. Cook on low for 6 to 8 hours and serve with rice. The extra sauce in the crockpot is great to saute vegetables in, like broccoli!

St. Andrew Kim, pray for us. 


Tuesday, August 9, 2016

Olympic Bites: Rio 2016

I. Love. The. Olympics.

Most of time I really don't care about sports very much. I've been known to turn off the Super Bowl in the first half because football is just so boring to me. But when the Olympics come around I am obsessed and I have to catch every moment that I can. Of course I love to watch the primetime sports like gymnastics and swimming, especially since I used to be a swimmer myself, but I also love watching the more obscure sports that don't always get much broadcast time otherwise. My son and I were just watching archery and fencing the other day and loving it. I remember a time when my sister and I couldn't take our eyes off a badminton game. My dad and I like to see who is winning in the shooting events. (Congratulations to U.S.A's Ginny Thrasher for coming out of nowhere to win the first gold of this year's games in 10m air rifle!) Maybe that's why I love it so much. In addition to the Olympics being filled with incredible feats from the world's best athletes, I get to see sports that I personally find more interesting than what is typically on t.v. otherwise.

Another thing that is fun about the Olympics is getting to learn about and explore other cultures. I enjoy seeing the unique, culturally significant uniforms of certain countries in the parade of nations,  or seeing an interesting flag or unknown abbreviation and figuring our where in the world that athlete comes from. Of course there is also learning about the country that is hosting the Olympics, in this case Brazil. And what is one of the best ways to explore a culture? Through it's food of course!


To kick off the Olympics I did a little research and made some delicious Brazilian treats to eat while we watched the opening ceremonies. Two of them were savory - Pao de Queijo, gluten free cheese bread bites that I think may start bringing to potlucks because they are delicious, easy to make, and really cute! It does use somewhat of a specialty ingredient, tapioca flour, but it is actually pretty easy to find in most grocery stores these days, and compared to other specialty flours, is not too expensive. The other savory bite was Coxinhas, a chicken and cheese dumpling with a crispy fried exterior. I also made a sweet treat - Brigadeiros. Though often described as a fudge ball, it's really more of a chocolate caramel covered in sprinkles, and nothing about that sounds bad, am I right?! Those of you familiar with the Mexican treat dulce de leche will recognize the process of  turning sweetened condensed milk into a caramel.  Let's start our culinary tour of Brazil with dessert first!


Olympic Medal Brigadeiros

One 14 oz can sweetened condensed milk
3 Tbsp cocoa powder
1 Tbsp butter
Sprinkles or other coating of choice - chocolate sprinkles are traditional, I used gold and silver to represent Olympic medals, you could also use something like nuts or coconut.

Combine sweetened condensed milk, cocoa, and butter to a saucepan.

Cook over low heat, stirring constantly for about a half hour. The mixture should be smooth and thick. When you make a line down your pan with your spatula, it should take a couple seconds before the mixture floods the empty space. When it cools you should be able to shape it like playdough.

Remove the mixture from the heat and let it cool. Butter the palms of your hands to prevent sticking, and taking about a teaspoon at a time, roll the mixture into a ball and then roll in the sprinkles and set aside. I was able to make about 20 brigadeiros with this recipe.


Pao de Queijo

1 egg
1/3 cup olive oil
2/3 cup milk
1 1/2 cups tapioca flour (also called tapioca starch)
1/2 cup of grated cheese (whatever  you like best will work. I used sharp cheddar and parmesan, though you may want to reduce the salt when using parmesan)
1 teaspoon of salt

Preheat the oven to 400 degrees and grease a mini muffin tin.

Put all ingredients in the blender and pulse until smooth.

Pour batter into greased mini muffin tins, about 3/4 of the way full and bake for 20 minutes. Let cool for a few minutes before eating. They taste good cold too!

Makes about 2 dozen


Coxinha

for the filling:
4 oz of cream cheese
4 oz canned chicken (or cooked shredded chicken. Would be good with leftover rotisserie!)
2 green onions
salt and pepper

for the dough:
2 cups chicken stock
2 Tbsp olive oil
1 tsp salt
1 1/2 cups flour

for the coating:
2 eggwhites
plain breadcrumbs or cracker crumbs

oil for frying

Mix all filling ingredients together and set aside.

For those of you have ever made homemade playdough, the process for the dough will look and even smell a little familiar! Don't worry though, this dough tastes much better than play dough! 

Put stock, oil and salt in a pot and simmer. Once the liquid comes to a simmer, add the flour and mix together with a wooden spoon. Continue to stir until the dough is barely sticky and no dry spots of flour remain. It will pull away from the sides of the pot to form a ball.

Remove dough from the pot and let cool. Once cool enough to handle take about 2 tablespoons at a time and form a disc. Place about one heaping teaspoon of filling in the middle and bring up the edges of the dough and pinch to close.

Once all the coxinha have been formed, roll them in the egg whites, and then in the bread crumbs. Pan fry in hot oil until golden brown, about 3 minutes on each side. Season with salt and pepper while hot.

It is recommended to serve them hot, but I enjoyed them while they were cold too! Makes about 12.

Thursday, July 28, 2016

Catholic Calendar Magnets (Free Printables)

I love celebrating Catholic feast days and other celebrations throughout the year with my family, but sometimes I wouldn't realize that it was a certain feast day until the day of or even after, and I would have no time to plan an activity. Well, a while back I came across some printable calendar stick ons for Lent from Catholic Icing; little pictures you cut out and glue to your calendar to mark things like Ash Wednesday and no meat on Fridays. Since we have a whiteboard calendar rather than a paper calendar, I stuck a magnet on the back of them instead of glue. The bonus for this method is that you can print them once and use the same magnets over and over again each year. You could even laminate them if you wanted. I write the date of the feast or celebration on the back of each magnet. (By the way, have you ever heard of magnet tape? It's amazing! It looks like a roll of scotch tape, but it is a roll of magnet with a sticky back. So much easier than the loose magnet rolls with paper on the back!)

I know the picture's not the best, but we don't have the best light in the spot where we hang it. For those who are curious, sausage day was when we went to my dad's house to make homemade sausage! (And yes I know the month marker magnet at the top is not on the right month.)

I got to thinking that this would be a great idea for the whole year. Using reusable calendar magnets for Catholic feast days, birthdays, and other holidays would help me to keep track of when everything was and be ready to prepare for things in advance. I started last July and created a new set of magnets each month. We are back in July again, so I now have a full year's worth of magnets for my calendar that I am now happy to share with you! If you don't have a magnetic calendar you can glue them to a paper one.

I have a separate printable page for each month of the year, as well as one for things that occur throughout the year like birthdays, and one just for Lent, Easter, and other movable feasts that are based off the date of Easter. Advent magnets are included in the page for December.  Holy days of obligation are noted in the date guide for each printable, and the calendar markers are marked with an asterisk. I have used the United States guidelines for holy days of obligation, so if you are from another country they may vary. Remember that all Sundays, including Easter, are also holy days of obligation.

Just click the link below to view and print your Catholic Calendar markers! 

https://drive.google.com/drive/folders/0B8t98VBoR_3sNHY0OGxoNnNnNkU

Wednesday, June 22, 2016

Dads' Favorites: Mac and Cheese and Barbecue Ribs

Happy Father's Day to all the dads out there! Whether you are a father, grandfather, godfather, step father, foster father, or even a spiritual father as a priest, I hope last Sunday was a great day filled with lots of love.

I have fun spoiling the awesome dads in my life on Father's Day, and there are a lot of them! It can make for a busy day traveling around making sure we spend time with everyone, but it's good to remember what a blessing it is to have so many people that we love so close - especially thinking of the recent losses of one of my husband's grandpas as well as one of mine. They are dearly loved and very missed. All in all, on Sunday my kids got to be with all of their grandfathers, two of their great grandfathers, and of course their own dear dad and my wonderful husband who has taken on the challenging and rewarding role of stay at home dad. I'm so thankful for all the love, care, and guidance he gives to our kids every day.


We ended our crazy dad-filled day with dinner at my dad's house where I served up some of the favorite recipes of the dads in attendance. My dad's favorite, according the family cookbook, is barbecue ribs. We never ate them that much growing up, but I think that I may be partially to blame since I have always been terrible at eating meat on the bone. If it was my fault, I think I made it up to him. Even though it was my first time making the recipe, it turned out great; succulent, tender pork  smothered in the best barbecue sauce I've ever had - there was definitely a lot of finger licking! Homemade makes the difference! My husband's favorite is macaroni and cheese. I once again turned to my grandma's recipes in the family cookbook, and he said it was the best mac and cheese I've ever made. I only made a couple slight tweaks with the shape of the pasta and topping it with cheese crackers instead of bread crumbs.  I've got to say that our family cookbook never fails and is one of the best things I own. Here's to the family cookbook, and of course here's to you Dad!


Barbecued Ribs

Cut baby back ribs into pieces with 2 ribs in each piece. Parboil in water for about 30 minutes until
getting tender and the fat is pretty much gone. Transfer ribs to baking pan. Cover with barbecue
sauce. Cook at 350 until meat falls off the bone. (I found that this will take between 2 to 3 hours.)

Barbecue Sauce
3 cups ketchup
1 cup sugar
1/2 cup water from parboiling ribs
2 Tablespoons chili powder
1 onion - minced
3 Tablespoon vinegar (or 1/2 cup dry white wine)
6 cloves garlic - minced
dash of Worcestershire sauce 
1 Tablespoon Dijon mustard
optional: 1 Tablespoon liquid smoke
                lemon and orange slices 


Macaroni and Cheese 

1 box cavatappi pasta
1/4 cup butter
1/4 cup flour
2 cups milk
1/4 teaspoon salt
dash of pepper
3 cups sharp cheddar cheese, shredded
cheese crackers and melted butter
1. Cook pasta until tender. Drain and set aside.
2. Melt 1/4 cup butter in sauce pan over low heat until smooth and bubbly. Stir in flour.
3. Remove from heat and stir in milk - adding the mild at little at a time, stirring occasionally to the mixture doesn't get lumpy. Add salt and pepper. Return to heat and bring to a boil for about a minute.
4. Mix together the pasta, white sauce, and shredded cheddar cheese. Put in a large casserole dish and top with crushed cheese crackers that have been mixed with melted butter.
5. Bake at 350 degrees for 20 to 30 minutes. 

Tuesday, May 24, 2016

Zucchini Pancakes


     Actually they are not merely zucchini pancakes, but whole wheat zucchini flax pancakes. Putting that as the title made me feel a little too hippy-dippy though. I guess when it comes to cooking I can get that way sometimes. I should probably just embrace it!

    Those who share my struggle of having a child who's a picky eater have probably come across many ways to sneak vegetables into their children's food - spinach smoothies, sweet potato mac and cheese, etc.  I've given lots of yummy concoctions a try, but I've found that pancakes really offer a great blank canvas. The two variations I make the most are pumpkin pancakes and these zucchini ones, but I've also done carrots, butternut squash, sweet potatoes, bananas, and blueberry puree. I usually make them with whole wheat flour, and add in things like wheat germ or flax meal when I have them on hand.

     Though I say that I'm "sneaking" in the healthy stuff, I try to never add things into my kids' food that they don't know about. In order to try to teach them good eating habits that will last into adulthood, if I'm adding veggies or other healthy ingredients in a creative way, I make sure that they are aware and even have them help me make the recipe. My six year old may not ask me for zucchini at snack time, but he does ask me to make zucchini pancakes for breakfast. I'll take what I can get!

  So if you or your children are pancake lovers, I encourage you to get creative and see what you can come up with! And if you are looking for some other ways to get a few extra veggies into your kids, I've got you covered with a few recipes from the archives:

Broccoli Cheddar Biscuits
Kid Friendly Chili (with  red beans and pumpkin)
Whole Wheat Pumpkin Pancakes
Spinach Parsnip Muffins (whole wheat of course!)


    Whole Wheat Zucchini Flax Pancakes 

1 egg
1 cup milk
1 cup whole wheat flour
1 Tablespoon sugar
1 teaspoon baking powder
1/2 teaspoon baking soda
1/2 teaspoon salt
2 Tablespoons flax meal
1 teaspoon of cinnamon
1 medium zucchini, shredded


Beat the egg and mix all ingredients together until smooth.

Grease a hot griddle or large pan. Ladle batter onto the hot surface. When bubbles form on the surface of the pancake, it's time to flip.

Top with your favorite pancake toppings. My son likes syrup, my husband went with peanut butter, and as you can see from the pictures, I went with some homemade gooseberry/blueberry jam!

Monday, May 9, 2016

Ascension Thursday: Neapolitan Meringue Cookies

  I hope everyone had a wonderful feast of the Ascension! This feast celebrates the return of Jesus to heaven forty days after his resurrection. It is a solemnity, and so accordingly we should make it a day of celebration and festivity!  Traditionally Ascension is celebrated on a Thursday, exactly forty days after Easter Sunday, (and is a holy day of obligation by the way). However, in the United States and a few other countries the feast gets moved to the Sunday after. It does make remembering to go to church on Ascension day easier, and it also gives a little wiggle room for when to have your Ascension celebration. I just hope the reason that it got moved in the U.S. wasn't because people thought Americans were too lazy or too apathetic to make it to church on a Thursday!


   One of the traditional ways to celebrate the Ascension is to have a picnic, and this year in Michigan the weather was just perfect for it! I just love getting to eat outside, so I particularly like this way of celebrating.  I think preferably the picnic is supposed to be on a hill to represent being close to heaven, but we're pretty flat here in this region of the mitten state.

To keep the minds on all things heavenly the menu usually consists of some sort of poultry, for their ability to fly up into the heavens, and a light and fluffy dessert, reminiscent of heavenly clouds. For the main course I made my new favorite chicken dish that I learned from watching "The Kitchen" on the Food Network. There aren't many shows that I make sure I watch every week, but on Saturdays at eleven o'clock, I almost always know what I'll be doing! This roasted chicken dish includes a side of carrots and potatoes, and is made on a single sheet pan, so clean up is pretty easy. It's full of wonderful flavors like lemon, rosemary, and thyme. My son's favorite part is the crispy chicken skin. You can find the recipe here.

Chocolate, Strawberry, and Vanilla
 For the dessert I knew I wanted to do something with meringue. I mean what is more light, fluffy, and cloud like than meringue? I decided to go with a baked meringue cookie. The first time I encountered the meringue cookie concept was in my high school foods class. We made a chocolate chip version. I absolutely loved the idea, but personally I thought the chocolate chips weighed down and overpowered the meringue. I continued to experiment with the idea adding in my own flavors. Sadly, I lost my recipe folder from class, so I've been searching for a good recipe for meringue cookies. I think these ones turned out pretty well.


Making a meringue is super simple. The vanilla version has a mere five ingredients. And as a bonus, it happens to be dairy, grain, and fat free. One meringue cookie is only about 10 calories, so they're a great way to have a sweet treat without feeling too guilty about it. In addition to vanilla I also made strawberry and chocolate. Since I didn't use any food coloring, the visual difference between the three wasn't too striking after they were baked, but they sure were full of flavor and absolutely delicious! Meringue is a great blank canvas for lots of flavors, so feel free to experiment!
                                                                                    When piped in pretty design, they would also make a great decoration for cakes and pies.

Meringue Cookies

3 large egg whites
1 1/2 tsp vanilla
1/4 tsp cream of tartar
dash of salt 
2/3 cup sugar

For strawberry: freeze dried strawberries
For chocolate: cocoa powder

Combine the egg whites, vanilla, cream of tartar, and salt. Beat on high until foamy.

Gradually add the sugar, about a tablespoon at time, beating until dissolved after each addition. Continue beating until you reach stiff peaks.

Now is the time to add your flavors if you wish. I divided the meringue into thirds. I left one as it was for vanilla. In another third I folded in a handful of crushed freeze dried strawberries. In the last third I folded in about a tablespoon of cocoa powder.

Pipe or dollop the meringue onto a  baking sheet lined with a silpat or parchment paper. Bake at 250 degrees for 40 - 45 minutes. Turn off the oven, but leave the meringues in for 1 more hour. Take them out and let them cool. They can be stored in an airtight container. Enjoy!


Friday, April 22, 2016

Cooking for Eighty with Great Aunt Katie

Well, maybe it wasn't exactly eighty people, but it was a lot and eighty rhymes!

When I was in college at Central Michigan University I became part of an amazing Catholic student group called Corpus Christi. While I had always gone to mass every Sunday growing up, attended youth group, learned about the saints, things like that, Corpus Christi helped me to be on fire for my faith more than I ever had before. I grew in knowledge of my faith and love for God during that time in ways I never imagined possible. I also gained amazing life long friends who have moved on to become priests, nuns, brothers, awesome married couples, and single lay people living out their calling from God.

One of the important parts of our weekly meetings was ending by enjoying each others company over a meal. Back in my college days the group was a little smaller, so one kind woman cooked for us each week. Since then the group has continued to grow and grow, a very good thing, but it definitely made cooking for everyone a much bigger task. The new arrangement became for many people to sign up to volunteer and take turns cooking throughout the year. I still live in the area and wanted to give back to this group that had been so important in my life. So I signed up and two or three times a year I get to cook a big ol' heap of food for a large group of hungry college students.

When I first started cooking, the count was closer to around forty than today's eighty, so I would experiment and make something different each time - corned beef in March, my great-grandmother's enchiladas in May.  The group continued to grow, I moved a little farther away, and the dance classes I teach got moved to the day that Corpus Christi meets. I knew I needed to come up with a new plan.   So considering everything I needed to come up with something that was:

1. Budget Friendly
2. Easily made in large quantities
3. Able to be made ahead of time. (No cooking on site, only heating up) 
4. Something that a lot of people would like

As it turns out, my Great Aunt Katie had all the answers! Without even realizing it, the two dishes that I picked to make regularly for Corpus Christi both came from her. The first is something I grew up knowing as Katie's Casserole. Others may know it as Hot Dish or Tater Tot Casserole. The second Great Aunt Katie dish I make for them is a dessert I have shared on the blog before - 
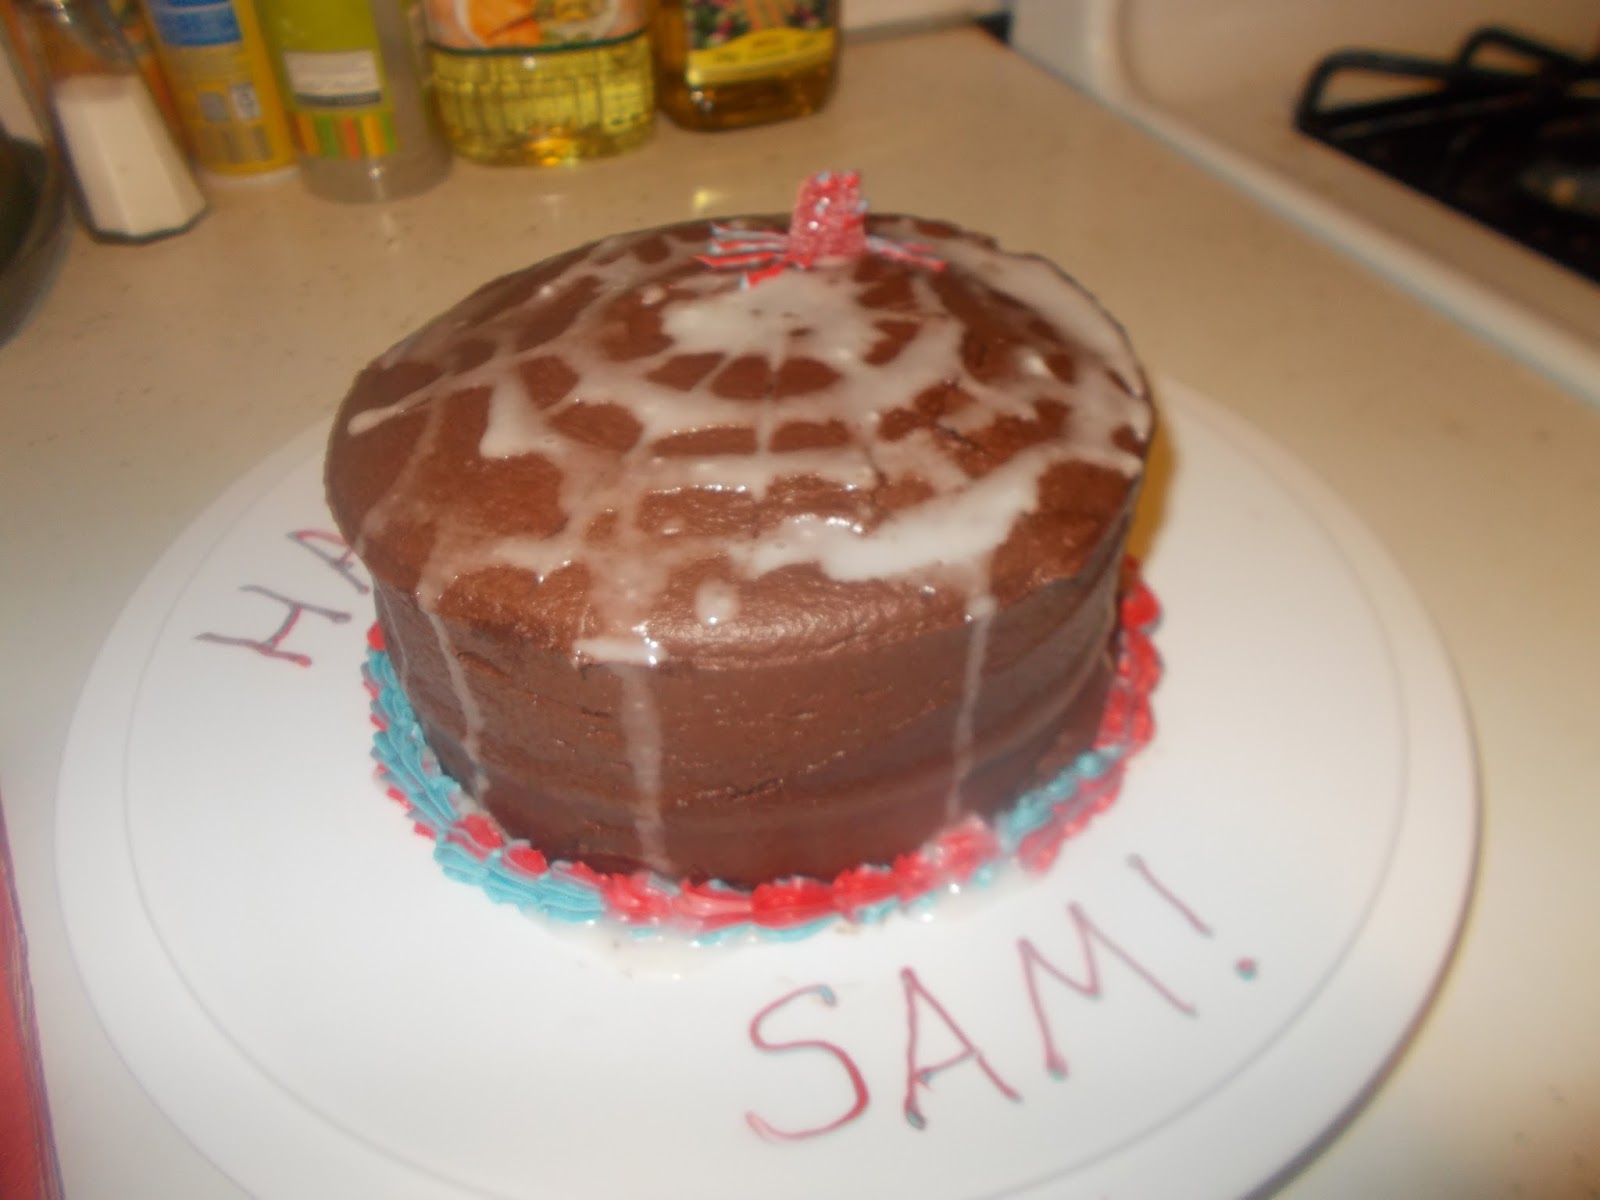
Katie's Rhubarb Cake. However, since rhubarb isn't in season during the school year I change it up a little bit and turn it into Katie's Peach Cake. I also chop up some lettuce and veggies for a salad side dish.


The great thing about using these recipes is that not only do they meet all of the above requirements, but if I do my cooking in disposable aluminum pans, I dirty a total of four dishes/utensils. Four! Cooking for eighty people! I get absolutely nothing dirty making the casserole. Everything goes right into the pan. For the cake I dirty one mixing bowl and one spoon. Then I also have to wash one cutting board and one knife after I chop veggies for salad.

Putting together the Katie's Casserole is so easy that sometimes I make it on my lunch break from work the day of. After I cook it, I let it cool, pack it up, and then warm it up in the ovens at church when I get there. Katie's Casserole is always a hit, I mean who doesn't love a good tater tot?


Katie's Casserole
The following quantities are for a single recipe. I sextuple it when cooking for Corpus Christi

1 lb ground beef
1/4 of an onion - diced
1 bag frozen french style green beans
1 can condensed cheddar cheese soup
1 bag of tater tots
salt and pepper

1. Press the ground beef into the bottom of a 9 x 13 baking dish, making one thin layer that covers the whole bottom of the pan. Season with salt and pepper and sprinkle with diced onions.

 2. Add a layer of green beans and cover with cheddar cheese soup (undiluted).
 3. Top with tater tots and bake for one hour at 350 degrees - until the beef is cooked through and the tots are golden brown.

Enjoy! Don't forget that one of the benefits of being the cook is you get to steal a few tater tots off the top before you serve it everyone else. 


  Of course I also make the cake ahead of time, so I when I arrive at the church all I have to do is set it on the table with some cans of whipped cream! Easy and oh so delicious. I love desserts with fruit, and this recipe can be adjusted to use almost any type of fruit and jello flavor that you like.The original uses fresh rhubarb and either strawberry or raspberry jello. To peach-ify it I use frozen peaches and orange jello.

Katie's Rhubarb Cake - Peach Style
The quantities here are for a single recipe. When I cook for Corpus Christie I quadruple it. 


1 box of yellow cake mix
ingredients to make cake mix (eggs, water, oil)
1 bag of frozen peaches (I added a few blueberries this time too.)
1 box of orange gelatin
sugar
whipped cream for serving

1. In the bottom of a 9x13 baking dish mix together the peaches, gelatin powder, and little sugar.
2. Make the cake batter according to directions on the box, and pour over the fruit mixture.
3. Bake at 350 for about a 30 minutes (or check directions on cake mix box for a 9 x 13 cake) - cake should be golden brown on top and a toothpick should come out clean when stuck in the center.
4. Top with whipped cream and enjoy!
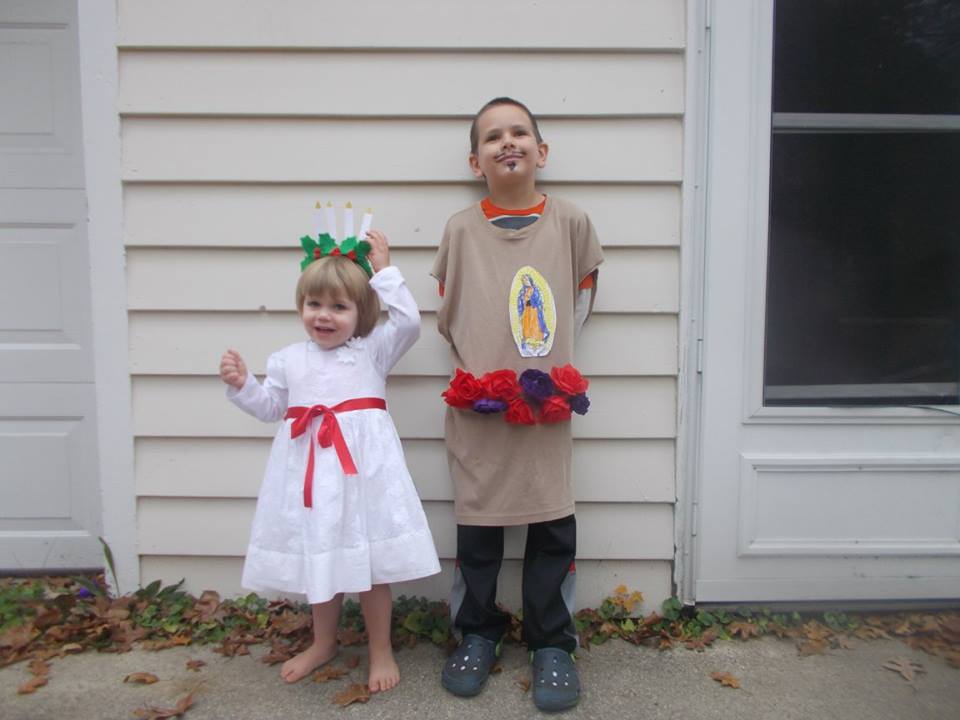
Tuesday, March 15, 2016

Spaghetti Pi(e)

Yesterday, March 14th was Pi Day! Pi of course being the irrational number 3.14.... used to find measurements like area in circles.  I'll admit that math is not my favorite subject, but I am a big fan of the food pie, so any day where there is an excuse to make some pie sounds good to me!  My husband who loves math, (he does it for fun!), says that we should wait and celebrate Tau Day because tau, (6.28....), is a better and more accurate number for working with circles.  He says why use 2πr when you can just use τr?   Despite what the mathematicians say, I think I will stick with Pi Day, because tau just isn't as tasty as pie!


I took me a little while to decide what kind of pie I should make for our mathematical celebration. It was a weekday after the daylight savings time change, the day before pay day, and the kitchen could stand to be cleaner than it is. (Okay, that last one pretty much applies to every  day!)  Due to that I knew I wanted something not too labor intensive with ingredients that I pretty much already had on hand. I almost decided on my brother's pocket pie recipe, I felt like for Pi Day the end product should be a circle rather than a rectangle. Finally, it came to me. I remembered one of my favorite dishes I used to make as a little girl from my American Girl cookbook - spaghetti pie! I love that I can still get use out something I learned in elementary school.  Basically it is spaghetti with meat sauce, but put together like a pie so you can serve it in slices. It really is a wonderful weeknight family dinner, and the presentation adds a factor (math pun not intended), of fun. The original recipe included diced onions and green peppers in the meat sauce component, but due to a recent indecent with the 6 year old involving, (gasp!), onions in the taco meat I decided to leave them out. I also substituted whole wheat pasta and ground turkey for regular pasta and ground beef. A simple salad with some easy homemade dressing made for a nice accompaniment, and for dessert I whipped up some instant chocolate pudding and poured it over a graham cracker crust. I used some peppermint chips for my pi symbol decoration. Happy Pi Day everyone!

Spaghetti Pie

Ingredients: 
8 oz whole wheat spaghetti
1 egg
1/3 cup grated Parmesan cheese
1 Tbsp soft butter
1/2 pound ground turkey or beef
1 cup of pasta sauce
3/4 cup ricotta cheese
1/2 cup shredded mozzarella cheese

Directions : 

1. Boil the spaghetti in salted water until done. Drain and rinse in cold water.
 2. Beat together the egg, Parmesan, and butter. Mix with the spaghetti.
3. Grease a pie pan with a little bit of shortening. Press the spaghetti mixture into the pie pan to form the crust.
4. Brown the ground meat and add the pasta sauce. (optional, add diced onions and green peppers)
5. Spread the ricotta cheese in a layer over the spaghetti crust. Top with the meat and sauce mixture. Sprinkle the mozzarella cheese over the top.
6. Bake at 350 degrees for 30 minutes.
7. Let cool for 10 minutes after it comes out of the oven. Slice and enjoy!


    -  You can also whip up this easy dressing to serve with your salad!

 Italian Dressing in a Jar

In a  jar with a tight fitting lid, combine:

1/2 tsp minced garlic
2/3 cup olive oil
1/3 cup white wine vinegar
1/2 tsp Dijon mustard
Dried basil, dried oregano, and onion powder to taste ( this means I eyeballed it!)

Put the lid on the jar and shake to combine. Easy peasy lemon squeezy! 

Sunday, January 31, 2016

Irish Dancer Cake


Isn't she adorable! This has got to be one of my favorite cakes I've made in a while. It was another cake for a birthday party at the dance studio. Typically, the birthday girl asks for ballet or hip hop as her theme, but this one wanted all things Irish! It was so much fun to mix it up a little. A friend of mine had given me an old Barbie princess shaped cake pan, and I knew that this was the perfect opportunity to use it. Barbie's big 80's hair would be perfect for the bouncing curls of a traditional Irish dancer.  Once again my round and star tips served me well. I think this pan will work well to create ballerinas too.  Now I'm just waiting for someone to ask for my favorite style of dance, tap!

Friday, January 15, 2016

A Web Slinging Birthday

  Over Christmas break my oldest turned 6 years old, and this year he requested a Spiderman birthday party. I keep trying to convince him to have his party theme be Mo Willem's pigeon books, but it's his birthday and he wanted Spiderman. Not that there's anything wrong with Spiderman, I just have ideas I want to use for the pigeon! Maybe next year?  We came up with some good things for his chosen theme, and he and his friends had a lot of fun.

  We had two power outages over the break, so it was a little crazy getting everything ready, but thankfully we had power the day of his party and we were able to pull everything together just in time! With the power outages I didn't get the chance to bake a cake, so I bought one from the store and added some of my own decorations.
 I was excited to find a Bob Evans cake at the store. The restaurant isn't around anymore, but back when it was, they would give you a free chocolate cake if you went there the week of your birthday. Myself, my older brother, and oldest younger sister have birthdays all within the same week in December, so each December we would go to Bob Evans for dinner and get three free chocolate cakes, one for each of us. The extra special thing was that one of those cakes was always eaten with no plates and no utensils! It was so fun to dive right in and get delicious chocolate frosting all over our faces.  Now that I know I can still get the cakes this tradition can start up again!

 For Sam's birthday I jazzed up the cake by adding a web on top with royal icing. The icing was thinner and runnier than I would have liked, but a spider web doesn't need to be that neat, so it worked out. I colored some store bought frosting red and blue, and put them both in the same piping bag for a swirled effect. I used a star tip to make a border around the bottom, and a round tip to turn a gumdrop into a spider, and write a birthday message on the platter.


Activities at this age are pretty easy. I printed off some free Spiderman coloring pages for when everybody started arriving, and for the most part everyone just played together. Though we did have one big activity that was a huge hit.

We got a can of silly string for each party guest and wrapped it with a label I printed out that read "Spider Web."

Now, silly string can be very messy, and in the middle of winter, doing this activity outside wasn't really an option. With the help of some plastic table cloths, we were able to keep things relatively neat and easy to clean up. 

We put one plastic tablecloth on the wall and taped pictures of Spiderman villains to it. Just print, cut out, and stick! We also put a plastic tablecloth on the floor for easy clean up. The kids stood on the edge of the tablecloth on the floor and took turns blasting the bad guys with their spider webs! Everyone was cheering and smiling, and having a great time. Like I said, it was a big hit!


Happy birthday Sam! I've loved watching you become the amazing 6 year old that you are today, and I can't wait to see how you continue to learn and grow!


Related Posts Plugin for WordPress, Blogger...